


There is quite a lot of work to be done before and during the wedding you’re photographing. But after the grand exit and everyone’s said their goodbyes, the work isn’t over for you (as the photographer) yet!
If you’re anything like us – you love the editing process because it gives you a chance to see all the incredible moments you caught on camera. But a few weddings with several thousand photos to edit… well, it gets tiring.
That’s why we’re sharing how to edit wedding photos faster with our favorite 6 tips! Oh, and bonus – we’re sharing our 6-step workflow at the end of this post.
Some of the links in this post are affiliate links, which means I may make a small commission when you click the links and purchase, at no cost to you.
Why Does Speeding Up Your Wedding Photo Editing Workflow Matter?
Some photographers love the wedding photo editing workflow. So much so, that they’re completely happy with how it is – even if it takes hours. Many photographers find that that’s part of the art of photography.
We agree! But we also understand that, as destination wedding photographers, we’re business owners, too. Not just artists. That means the more time we spend editing a single wedding is money spent doing so.
Part of the reason Vic and I started Lilly Red Photography is that we wanted the freedom that came with having our own business. That freedom goes right out the window if we spend too much time culling photos and editing in Lightroom.
So we’re all about working smarter, not harder – all while still giving our clients the wedding photos that they can’t stop raving about. And yes! We still get those results from our clients all the time.
Trust us – learning how to edit wedding photos faster and still delivering a high-quality product is absolutely possible.

Wedding Photographer Software We Use for Our Editing Workflow:
We’ve spent years trying out different software and programs to help us refine our editing workflow. Some have worked out amazingly – others, not so much.
Let us save you some time and share with you our favorite tools:
- Aftershoot – AI Culling Software
- Lightroom – Photo Editing Software
- Renaissance Presets – Lightroom Presets
- Pic-Time – Client Galleries (Get 1 month free with our code: NZG43C)
How to Edit Wedding Photos Faster: Our Favorite 6 Tips to Use
Every time we photograph a destination wedding and edit one, we always keep these 6 tips in our minds. These are the exact ones that have helped us streamline and speed up, especially when we first learned how to edit wedding photos.
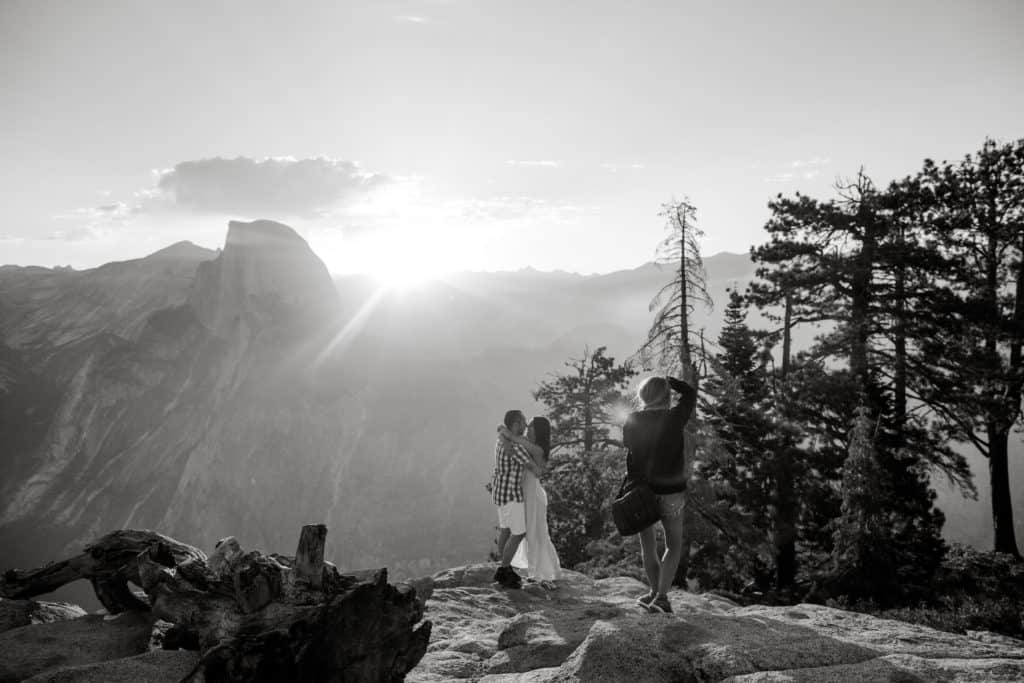
1. Get Everything as Close to Perfect In Camera
Maybe you’ve heard this before. But it’s worth repeating because it’s so incredibly important. You can cut down on an insane amount of time behind the computer if you learn how to handle your camera properly in the moment.
Everything from having the right settings to framing the shot properly in the moment is so crucial to our workflow.
If you can get it right in camera, it’s one less image you have to worry about editing and fixing up in Lightroom. And while that sounds like not a lot, think about it. If you shoot an 8-hour wedding, and you guarantee your clients 800 photos, that’s 800 photos that you have to make sure are perfect.
When you are truly the master of your camera, that means instead of single-handedly editing every single one of those photos, you can batch edit with your favorite presets, and that’s it!
But when you’re shooting a little too quickly and you don’t have the composition nailed, the lighting is casting odd shadows on your clients, or your focus isn’t razor sharp – those are all things you have to fix on the backend.
You can also think of it this way. The amount of time you spend on the wedding day stays the same, no matter what the photos look like in the camera. The amount of time you spend editing drastically changes based on how you spent your time on the wedding day.
So if you take nothing else from this list of our favorite tips for editing faster – take this one! Master your skills behind the camera!

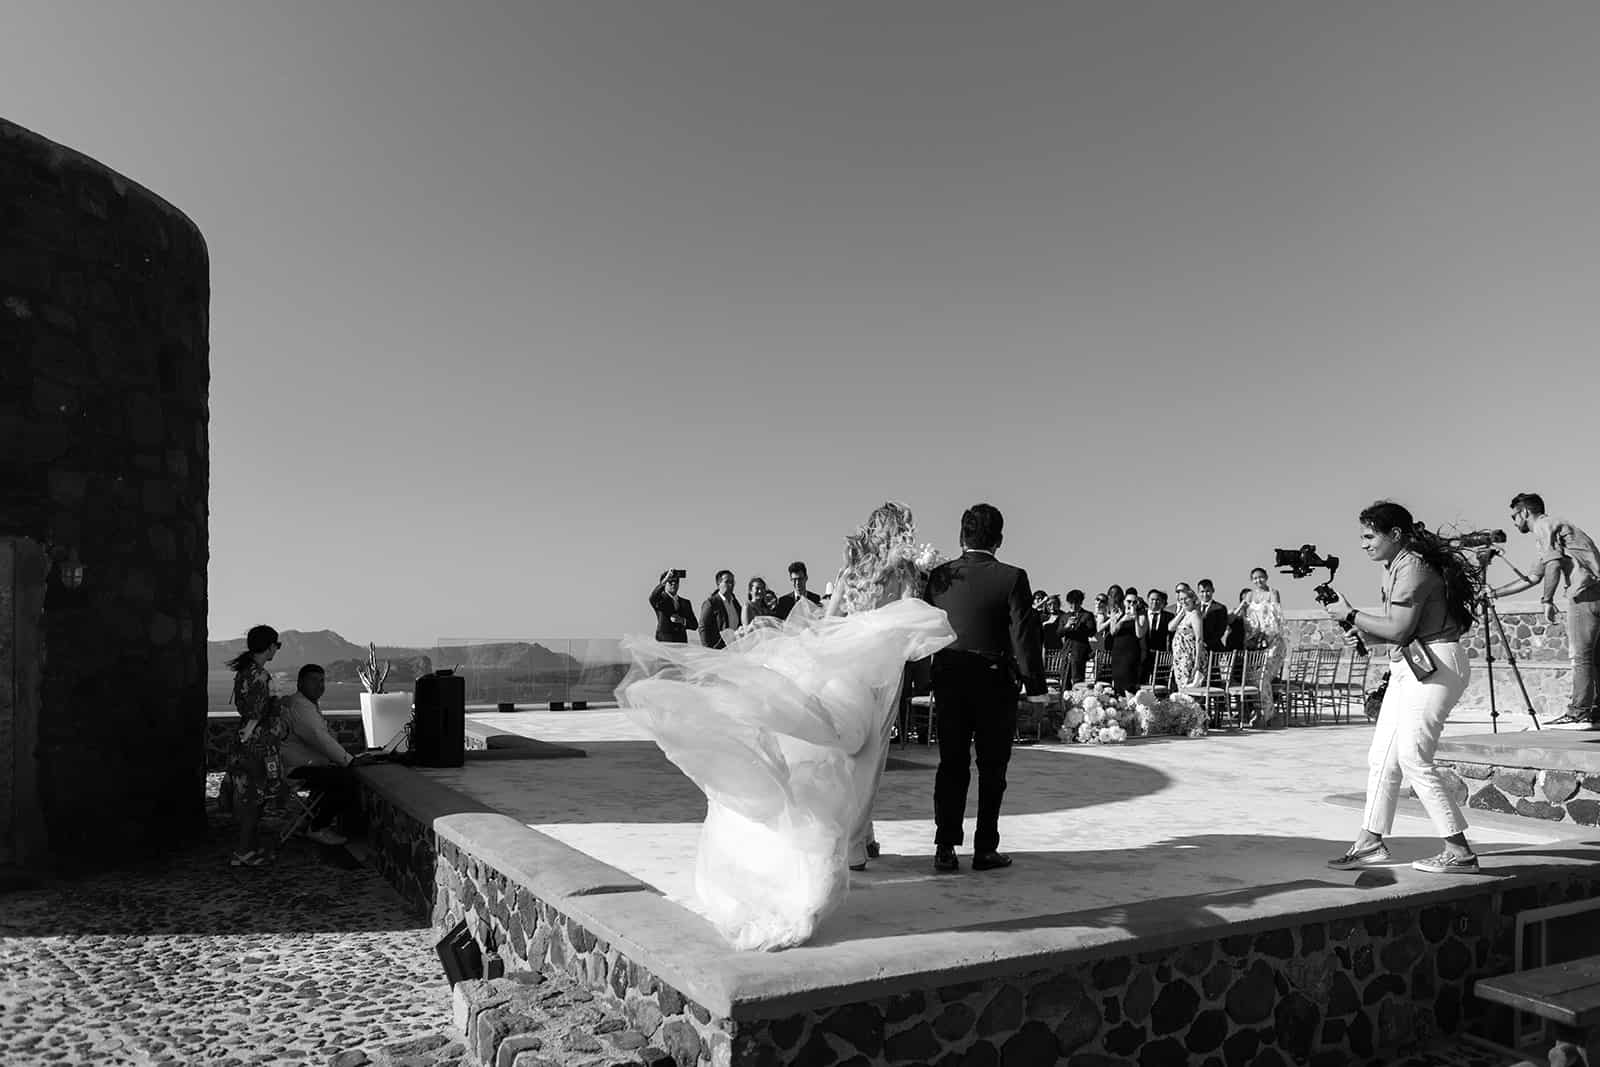
2. Don’t Get Too Shutter-Happy
It sounds so simple. It even sounds like something that shouldn’t matter too much. But it truly does. So much so that we even look for this skill when we’re finding our second shooters!
The point here is to be intentional with your camera and your shutter button finger. Like we mentioned before, the amount of time you spend on the wedding day stays the same. But the time spent behind the scenes can change based on how you spent the wedding day.
If you get a little too shutter-happy, you’ll find that you may have taken thousands of photos on the wedding day. And that leads to you needing to cull images like crazy afterward.
Sometimes, the culling process can take forever, simply because it’s hard to decide between one amazing image and another. It only takes one image though! So save yourself time after the wedding by being more intentional on the wedding day.
Vic and I get it, though! Sometimes the wedding day is moving by so quickly. There are people all over the place. Everyone’s rushing around. It’s easy to start rushing through photos, too, because you don’t want to miss a single moment.
The best way to be more intentional about capturing your moments is to learn to recognize when you’re rushing. Then, stop. Take a deep breath. And tell yourself that nothing is so quick that you can’t take two more seconds to frame it perfectly in the camera.
It takes practice, but we promise – once you nail this, you’ll find that your wedding photo editing workflow is much more streamlined.
3. Speed Up Culling Photos with AI
This always seems to be every seasoned wedding photographer’s least favorite part. It definitely was ours!
When we first got started learning how to edit wedding photos, we started off using other culling software that made the process of choosing and rating photos much easier than doing it in Lightroom. (By the way, Lightroom is amazing for a lot of things – culling images is not one of those things.)
But it still was taking us so much time to sort through the photos and then be decisive enough to rate them. Sure, we knew which ones were just not going to go into the clients’ galleries. But trying to decide between two spectacular images that are almost identical? That part of the process gets old quick.
Plus, when you’re spending hours in front of the glaring computer screen. I mean, your eyes start to blur after a while!
So we found a way to really speed up our wedding photo editing workflow. Aftershoot is an AI culling software that does all of the selecting and rating for us. We just set the parameters and settings we want it to select and rate photos based on, and then we get to walk away from the computer.
It’s been one of the best decisions for our entire wedding workflow. It’ll tell you an estimated time of how long it needs before all of the images are culled. It’s usually between 30 and 60 minutes – compared to the 3 to 4 hours that we used to take. So Vic and I like to step away and enjoy dinner together or taking our dog out for a walk while Aftershoot does its thing!
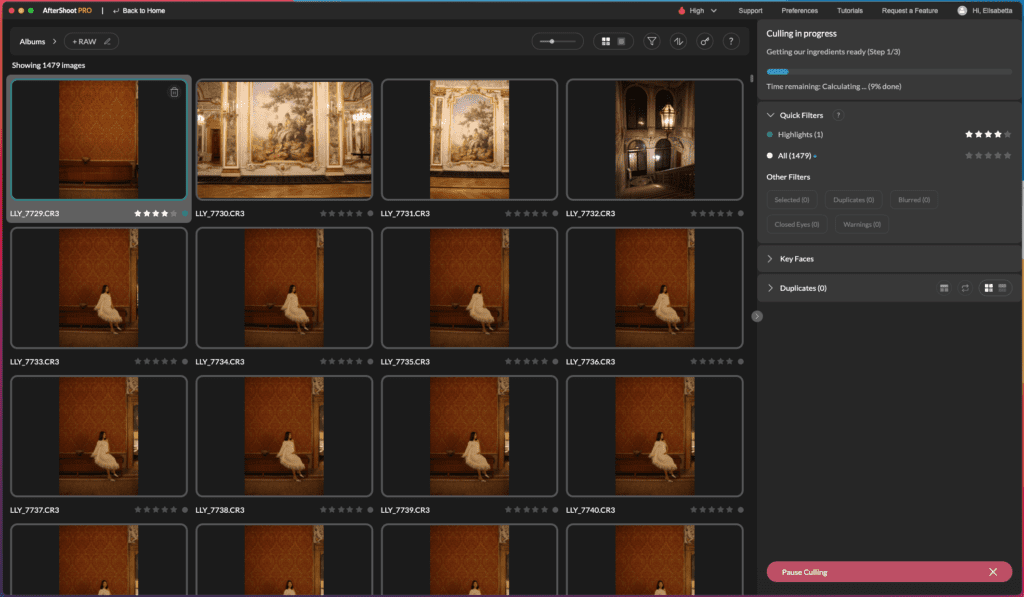
And if you still like having more creative control (don’t worry – we do, too!), it still lets us review the settings selections and pick alternates if we want.
This is such a fundamental part of speeding up your editing workflow. Especially when you’re photographing 10, 20, 30, 40, or even 50 weddings per year. Not to mention each of those weddings has around 2,000 – 4,000 images to sort through.
That’s anywhere between 20,000 and 100,000 photos to sift through, which takes hours to do. But as a business owner (not just a photographer), you have to realize that your time is your money. Once you optimize your workflow and reduce the amount of time it takes you to do something, you put more money in your pocket.
Aftershoot is the game changer to let you do that!
Add Aftershoot to Your Workflow!
4. Create an Organized System in Lightroom
If you could start a timer every time you went looking for a photo (or a group of photos), and then stop it once you found it…
You might be surprised at how long you spend hunting those down.
Having an organized system in Lightroom is such a major part of a faster editing process! And I really say this because Lightroom can be such a nightmare to navigate. Like I said before – Lightroom is amazing for a lot of things… but not all the things.
It doesn’t matter what your organization system looks like. But having something in place so you know exactly how to get to the photos you want to focus on will actually save you so much time in the long run.
We use the star ratings and color labels in Lightroom to organize all of our photos! It’s such a simple thing to do, but it saves us so much time. Here’s how we use it:
- Our favorite photos are rated 5 stars
- Then, we use flags to sort between our saved images and our culled images.
- Once we have filtered down to all of our saved images, we add color labels to photos based on whether or not they need extra attention or further editing.
5. Use Lightroom Presets to Set the Base of Your Signature Editing Style
If you’re not yet using Lightroom presets because someone told you that it’s “cheating” or gave you some other excuse … please do yourself a favor. Start using them!
Using presets is not cheating or taking a shortcut. It’s working smarter, not harder. If you’ve mastered how you set everything up in camera (before post-processing), and you’ve refined your signature editing style, then you know that you’re going to apply pretty much the same settings to every photo.
So why would you do it one by one when you can do all of them in a matter of seconds?
And if you haven’t yet refined your signature style, then I’d love to invite you to check out my Ticket to Destination Wedding Photography course. We dive deep into how to figure out what your style is so you can stand out from the crowd of other photographers who all like to shoot in one (or two) styles!
6. Streamline the Rest of Your Lightroom Editing Workflow
Lastly, when it comes to how to edit wedding photos faster, you have to take the time to streamline the rest of your editing workflow in Lightroom.
We have an entire guide on how to do that, plus we walk you through our Lightroom editing workflow!
Bonus! The 6-Step Lilly Red Photography Wedding Photo Editing Workflow:
Now that you have our 6 favorite tips on how to edit wedding photos faster, how about we walk you through how we use them for all of our clients!
Take a sneak peek at our simple, 6-step wedding photo editing workflow:
1. Backup All Photos Before Doing Anything
This is non-negotiable. I talk about the major importance of this and how Vic and I do it in our Ticket to Destination Wedding Photography course. But this is 100% step one, and I do not ever move on until this part is done.
2. Ingest photos into AI culling software
First, we have to ingest all of the photos from the memory cards (you can see which ones we recommend on our wedding photography equipment list) into our AI culling software – Aftershoot.
3. Set the software’s settings
Once all of the photos are in Aftershoot, we set our settings based on what we like in our photos (and what our clients expect of us!).
When everything’s set, we just let it go! This is usually when Vic and I walk away from the computers for a little while. We’ll go grab something to eat or take the dog out or just enjoy a relaxing moment.
Once Aftershoot is done culling photos, I’ll scroll back through and make sure its selections are spot on.
4. Pull Images into Lightroom and Batch Edit with Renaissance Presets
Next up, I import all of the images from Aftershoot into Lightroom. The AI photo culling software knows Lightroom is one of the go-to editing softwares out there. So it has the import function already built into the platform.
When they’re all in, I’m ready to batch edit. I already know that I love having my base edits on all photos, so I don’t have to worry about going into each individual photo to add the edits.
I just use my Renaissance presets on them, and that takes them 90-95% of the way there!
5. Retouch Photos as Needed
For the leftover 5 to 10% of edits that still need to be done – now’s when I do it. I’ve already streamlined my entire Lightroom editing workflow, so the retouching doesn’t take me nearly as long as it used to.
Or as it would if I didn’t work to refine how I sped up my entire process!
6. Upload to Pic-Time
When all of the images are edited and truly reflect the Lilly Red Photography brand reputation, they’re ready to go to my clients.
I upload them directly to Pic-Time which is my favorite online client gallery to use. It’s so easy for my clients to use, too. Plus, it looks sleek and professional – perfect for our brand!
But one of the best parts is that it’s also a fantastic marketing tool. It has emails and automations built into it. So we generate passive income from print sales (remember that time is money!). Meaning we don’t have to actively sit down and sell prints – Pic-Time does it for us while we’re busy doing other things. Clients can easily order directly from the gallery and receive super high-quality prints!
And just to show you how incredible this tool is at generating passive income for us, check out our 2022 results using it:

Get 1 month of Pic-Time for free with code “NZG43C”
When it comes to how to edit wedding photos faster, we’ve found (over years of experience!) that it comes down to streamlining your entire process.
That, of course, starts when you’re at the wedding! Then, we found that a major time suck was culling images. So we started using Aftershoot to help us cut that time from 3-4 hours per wedding down to less than an hour for each one.
Use these tips and see how you can transform your editing workflow! In the meantime, check out our other blogs for more destination wedding photography tips:


