


Now that I have plenty of practice and experience creating flat lay wedding photography, I love doing them!
But I remember when it was frustrating because it felt like I just didn’t have it totally nailed down. So if you’re feeling that way now, don’t worry!
I’m sharing my top 11 flat lay wedding photography tips, plus what items to include in your flat lay photos to make sure they’re stunning.

What Is Flat Lay Wedding Photography?
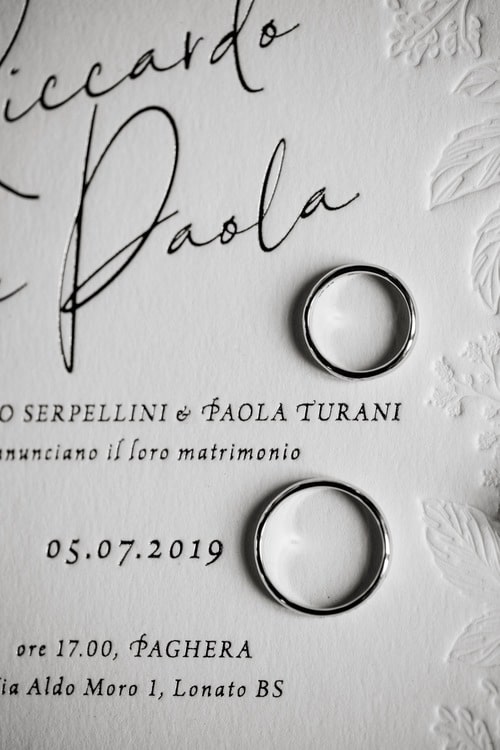
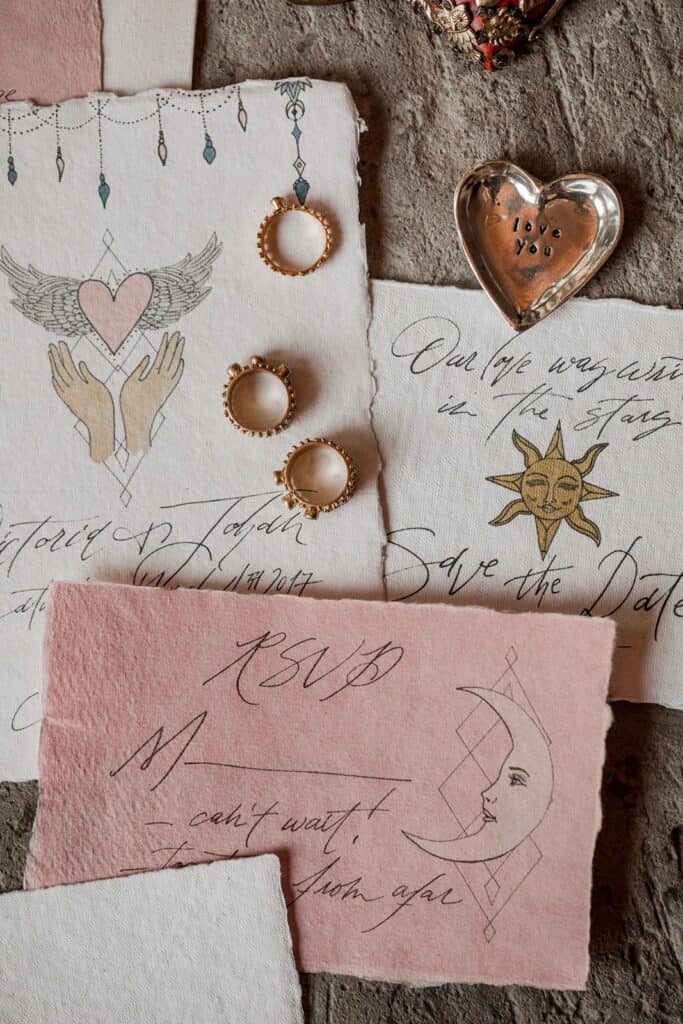
Flat lay wedding photography includes photos from the wedding day that showcase the details. All of those beautiful photos of the invitation suites, the wedding rings, and the bridal details? They’re all, more than likely, a variation of flat lay photography.
These kinds of photos are typically shot with a “top-down” view. It involves getting your camera parallel to the ground when you compose the photo in the viewfinder. Many of these photos include invitations, but they don’t always have to. You can get creative and incorporate all kinds of details for a flat lay photo.
But there are all kinds of ways you can take these photos to add variety and visual interest to your client’s wedding photo gallery!
Why are Flat Lay Photos Essentials in Client Galleries?
10 times out of 10, I include wedding day flat lays in my client galleries. And why is that? Remember, we’re telling the story of their wedding day through photos. Think of it like a picture book! And what does every book have?
Details.
Your wedding day flat lay photos showcase those details so your clients always remember every last part of their wedding – from the sentimental heirlooms to the perfume they wore.
Not to mention, this is another time for your creativity to shine! And since flat lay wedding photography typically takes place in the morning, during the “getting ready” portion of the day, you can think of it as a creative warmup for the rest of the wedding.
What to Include in Wedding Flat Lay Photos
To get an amazing flat lay photo with plenty of details, you’ll want to include a few things. First, have your main focal point. Then, you can add 2 or 3 supplemental items to really make the photo stand out.
Here’s a list of items you can use in your wedding day flat lay photos to capture the details of the day. But don’t be afraid to get creative! Use things that pertain to the clients – that’s what really matters!
Bride and Groom Details
These are some of the “go-to” items to grab for these kinds of photos. To make your job easier, ask the bride and groom to put any important items they want photographed in a small box. Then, ask the bride to set the box aside in her “getting ready” room so you can easily grab it.
Here are just a few things to include:
- Hangers (if they’re wood or have a design on them for the dress)
- Jewelry
- Earrings
- Bracelets
- Necklaces
- Wedding Day Shoes
- Heirlooms (brooches, etc.)
- Hairpieces
- Perfume / Cologne
- Veil
- Cufflinks
- Tie Clips / Tie
- Pocket Watches
Wedding Day Details:
Next, you’ll want to think about the details that really tie into the wedding day itself. Think about the venue, the location, the aesthetic, and any small details that matter.
That might include:
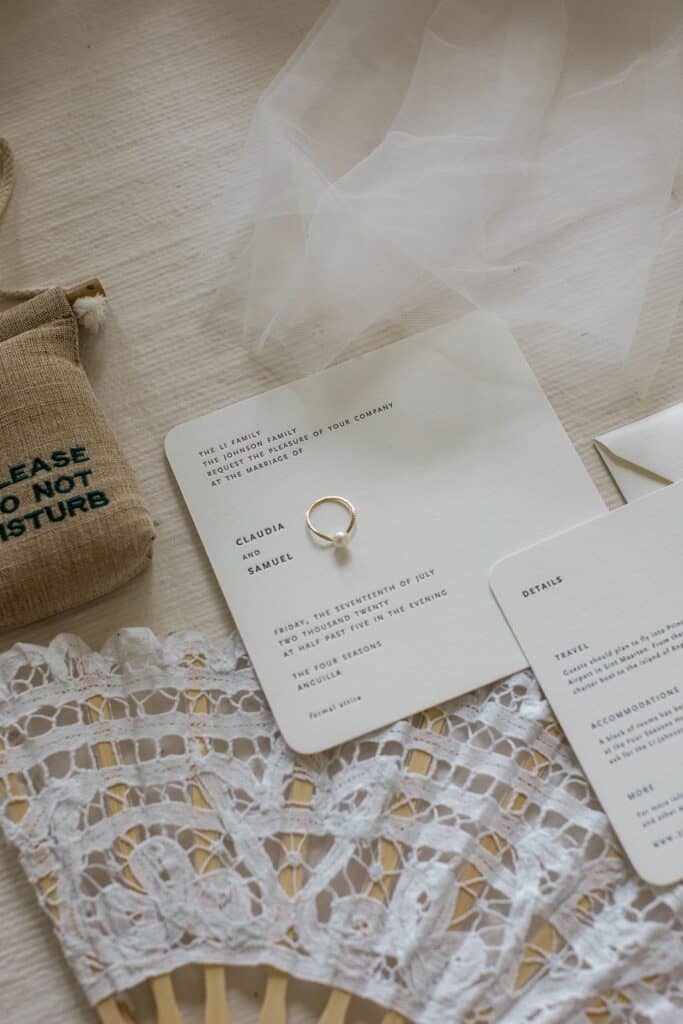
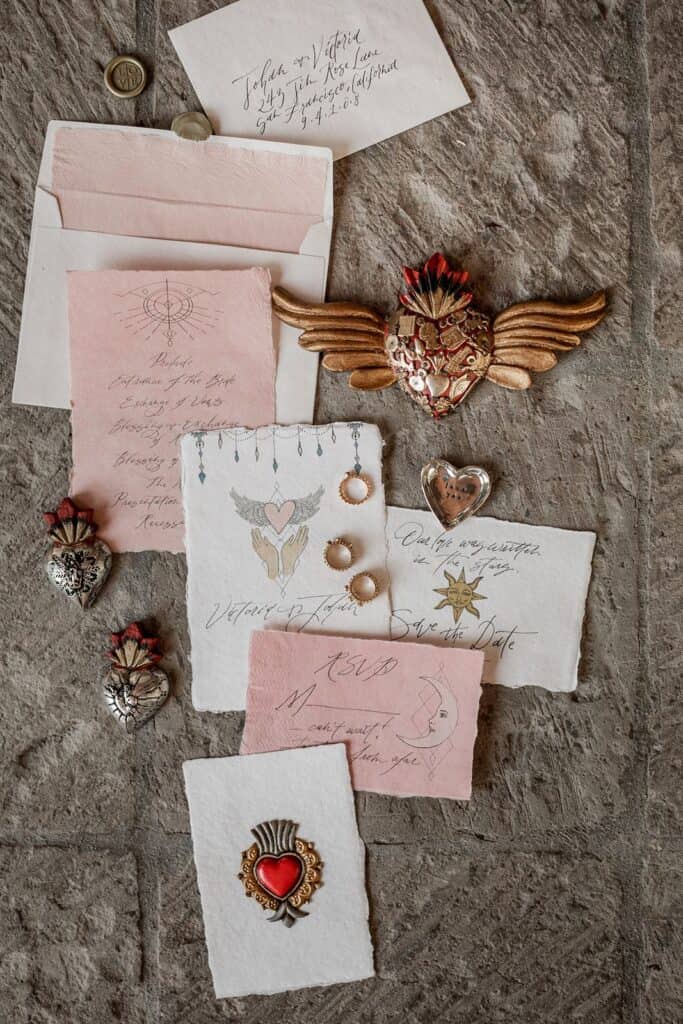
- Invitation Suite
- Invitation
- Details Card
- RSVP Card
- Envelope
- Wedding Rings
- Ring Boxes or Dishes
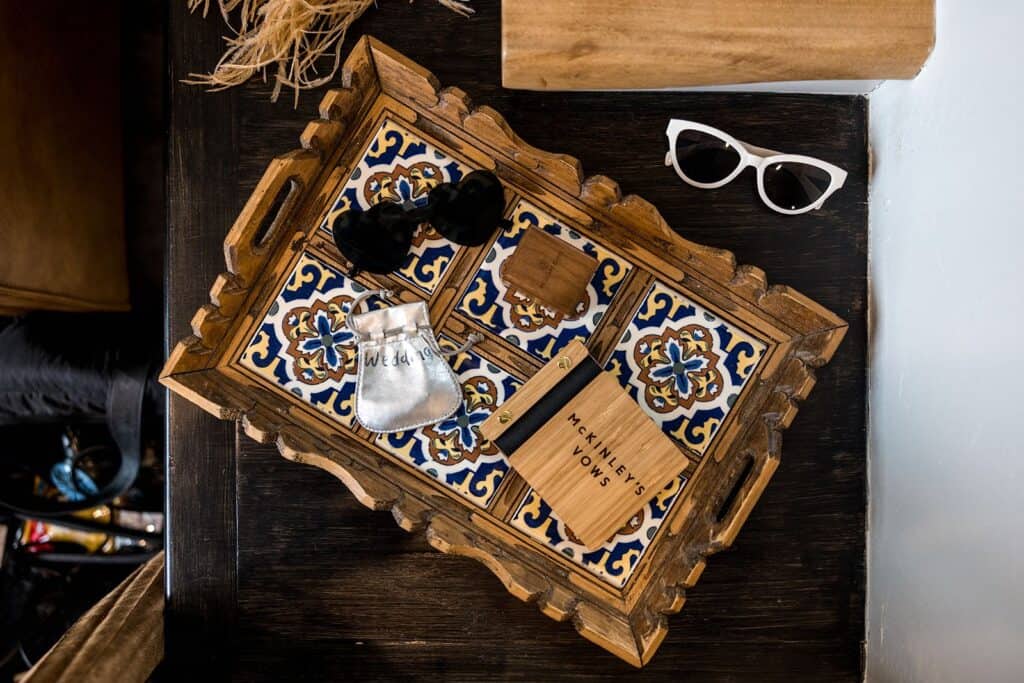
- Vow Booklets
- Ceremony Programs
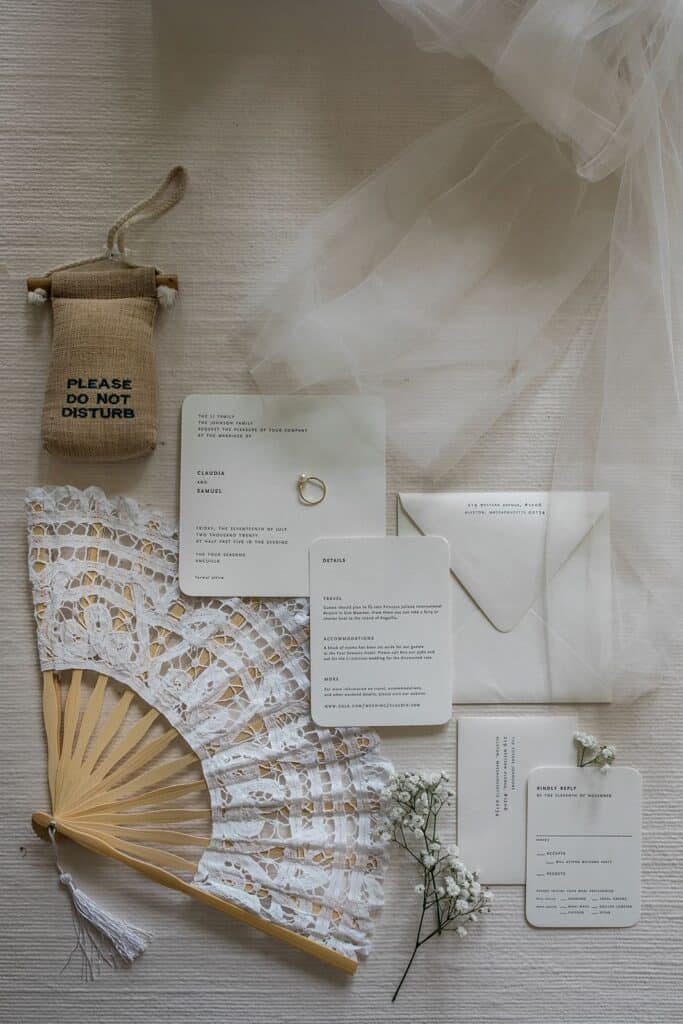
- Ceremony Fans
- Ceremony Favors
- Venue Aesthetic Details
- Name Cards of Bride and Groom (from reception)
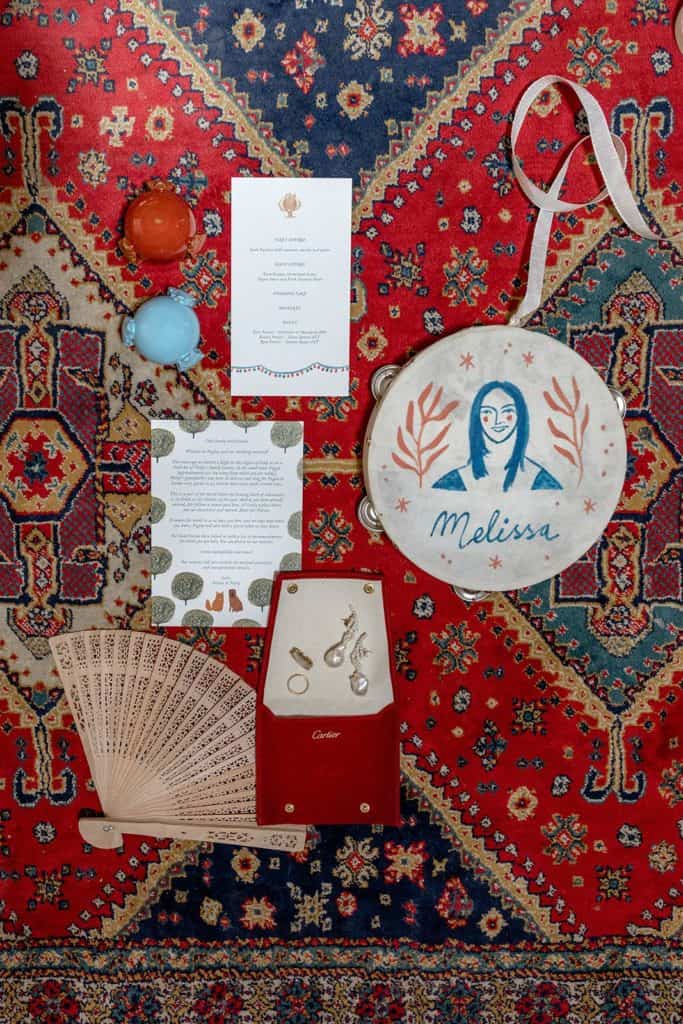
- Special Keepsakes, like the hand-painted tambourines from this Masseria Potenti wedding
Florals
Adding in extra stems of flowers from the main floral arrangements of the wedding day is a perfect way to add variety, texture, and visual interest to your wedding flat lay photos.
You can include:
- Boutonnieres
- Bouquets
- Extra flower stems (ask the florist for extra stem pieces)
Ribbons and Textiles
Using spools of ribbon is a go-to “trick” of the trade for wedding photographers! You can keep them in your own wedding flat lay photography toolkit so you can re-use them for the majority of your weddings.
I recommend picking out ribbons or textiles, such as Allegoria Textiles’ locally-sourced silk ribbons (my favorites!), in several different colors – usually the most popular colors you see on wedding days.
Miscellaneous Items
Sometimes you need more dimension or excitement in your photos, especially for weddings that don’t have too many details. For these kinds of weddings, you can keep a variety of miscellaneous items in your flat lay toolkit, too.
That might include:
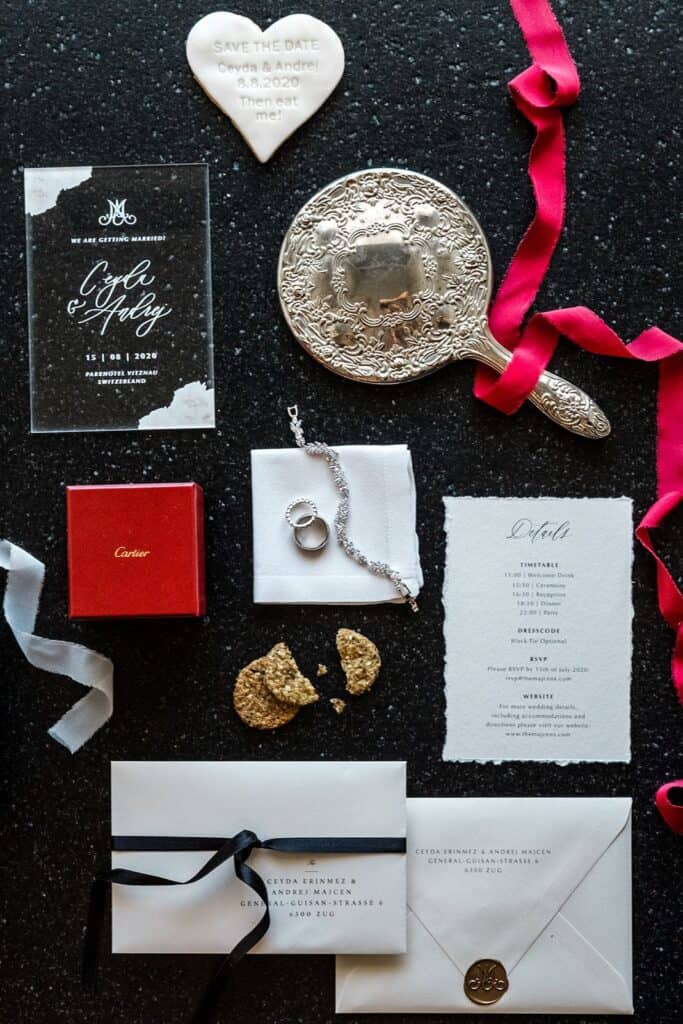
- Silver / Antique Trays
- Antique Keys
- Small, Silver Handheld Mirrors
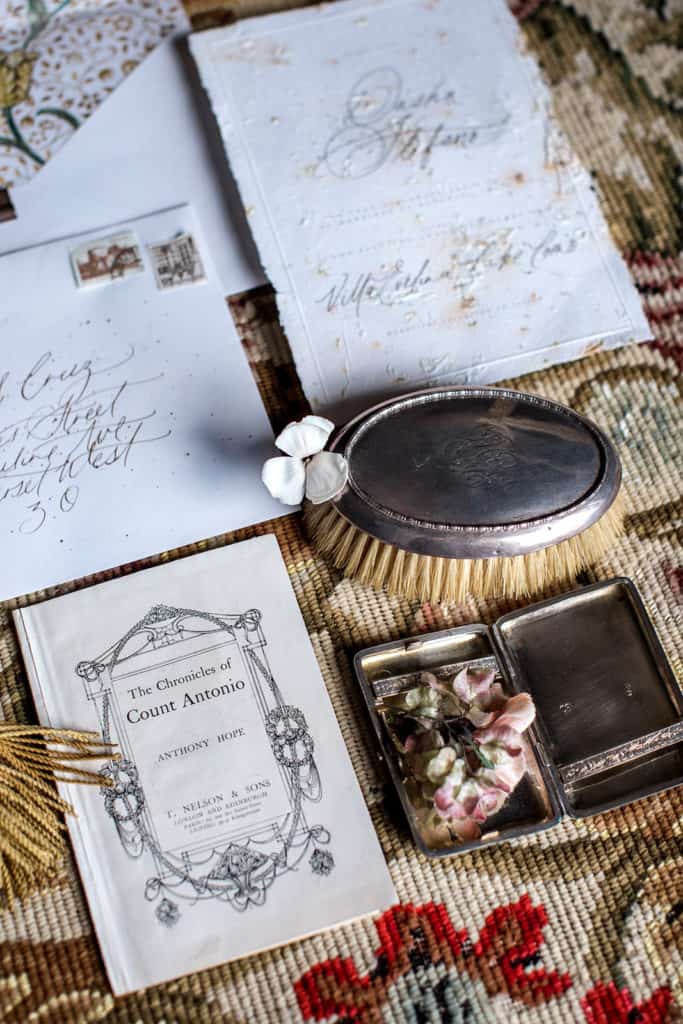
- Antique Cigarette Cases
- Antique Hair Brushes
- Postage Stamps
- Wax Seal Stamps
Top 11 Tips for Stunning Flat Lay Wedding Photography
When you have everything gathered for your flat lay photos, it’s time to start designing! This is where you can start to let your creativity fly.
But, I understand that designing flat lay compositions can feel overwhelming, especially when you’re thinking about all of the other photos you need to capture throughout the day.
Don’t worry! These 11 flat lay wedding photography tips will help you create stunning wedding day detail photos for every gallery you put together:
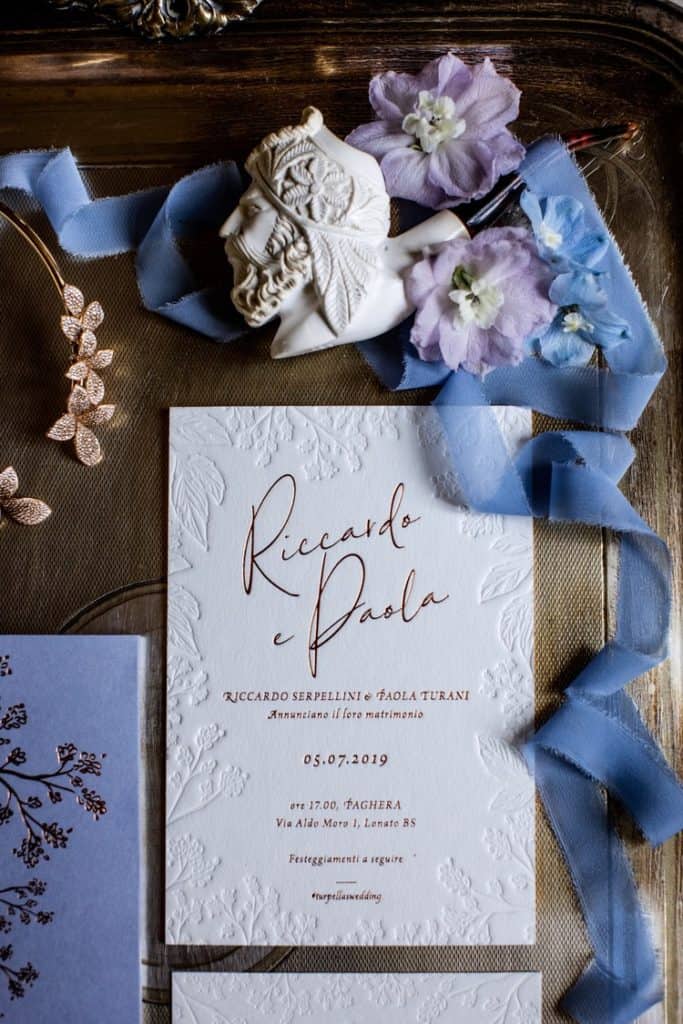
1. When In Doubt, Start With the Invitation
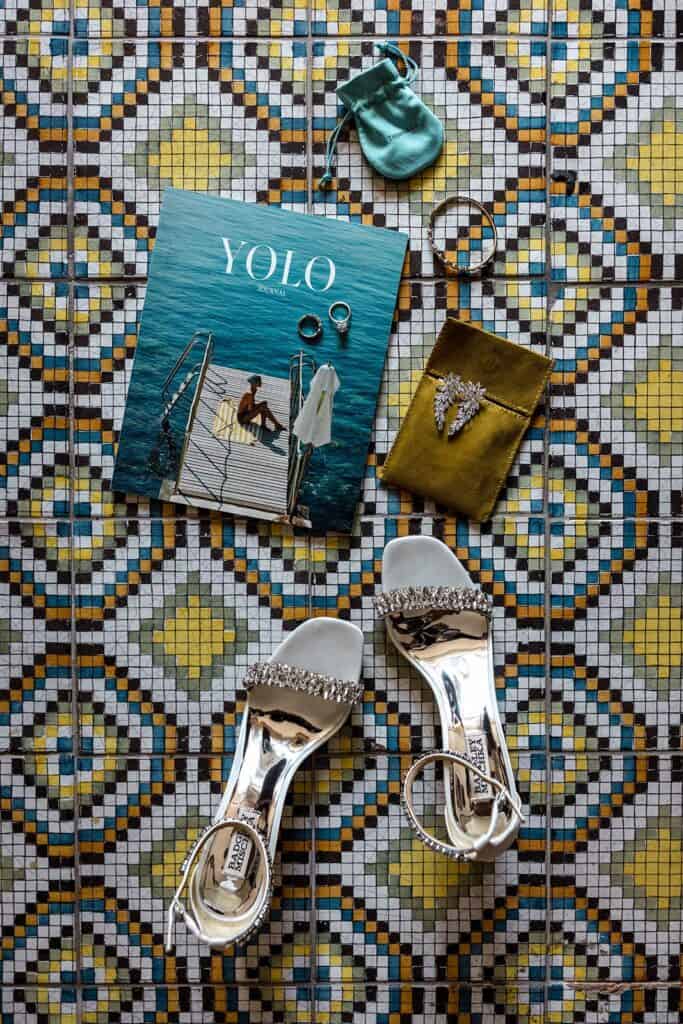
A flat lay photo can incorporate any detail as the focal point. I’ve created some that focused mainly on the bride’s shoes for the day. I’ve also created photos that incorporated many of the bride’s details, instead of the overall wedding day details.
Your flat lay photos can be whatever you’d like them to be! Just make sure you understand what your client wants first – then add your creative flair to it afterwards.
But if you’re stuck or overwhelmed as you look at your box of details, then keep it simple and start with the invitation. Let the invitation suite, including the main invitation, the details card, the RSVP card, and the envelopes take center stage.
Then, add additional elements around it as you see fit!

2. Choose the Best Lighting Available
Before you lay a single element down, be sure you have the best lighting available. Don’t hide in a dark corner and hope for the best! Instead, scout out the best possible lighting you can find.
Usually, this will be near a window. Even better if the windows have sheer curtains to diffuse any intense lighting. If you start with the best possible lighting, you can boost luminosity in your Lightroom editing workflow. But it will be much harder to do that if you start your photos with poor lighting.
3. Use the Right Background
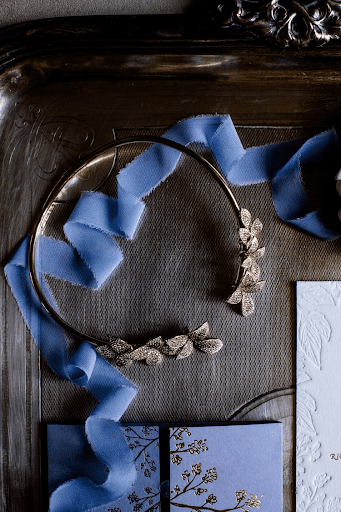
Behind the invitation, there’s an underlying focal point – the background. And the background in your wedding flat lay photos can make or break the overall design.
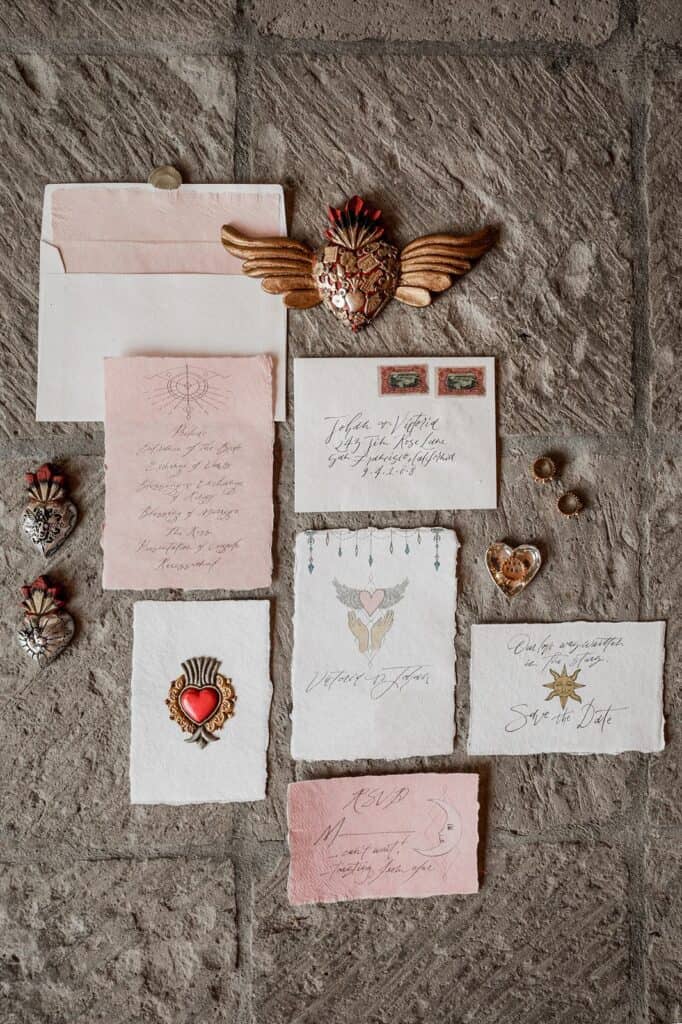
Think about it this way – if you have a soft, elegant, ethereal wedding day filled with blush pinks, light greenery, and cream colors, then a dark or black background would communicate the overall aesthetic. The same goes for a harsh pattern for a soft, garden-inspired wedding day.
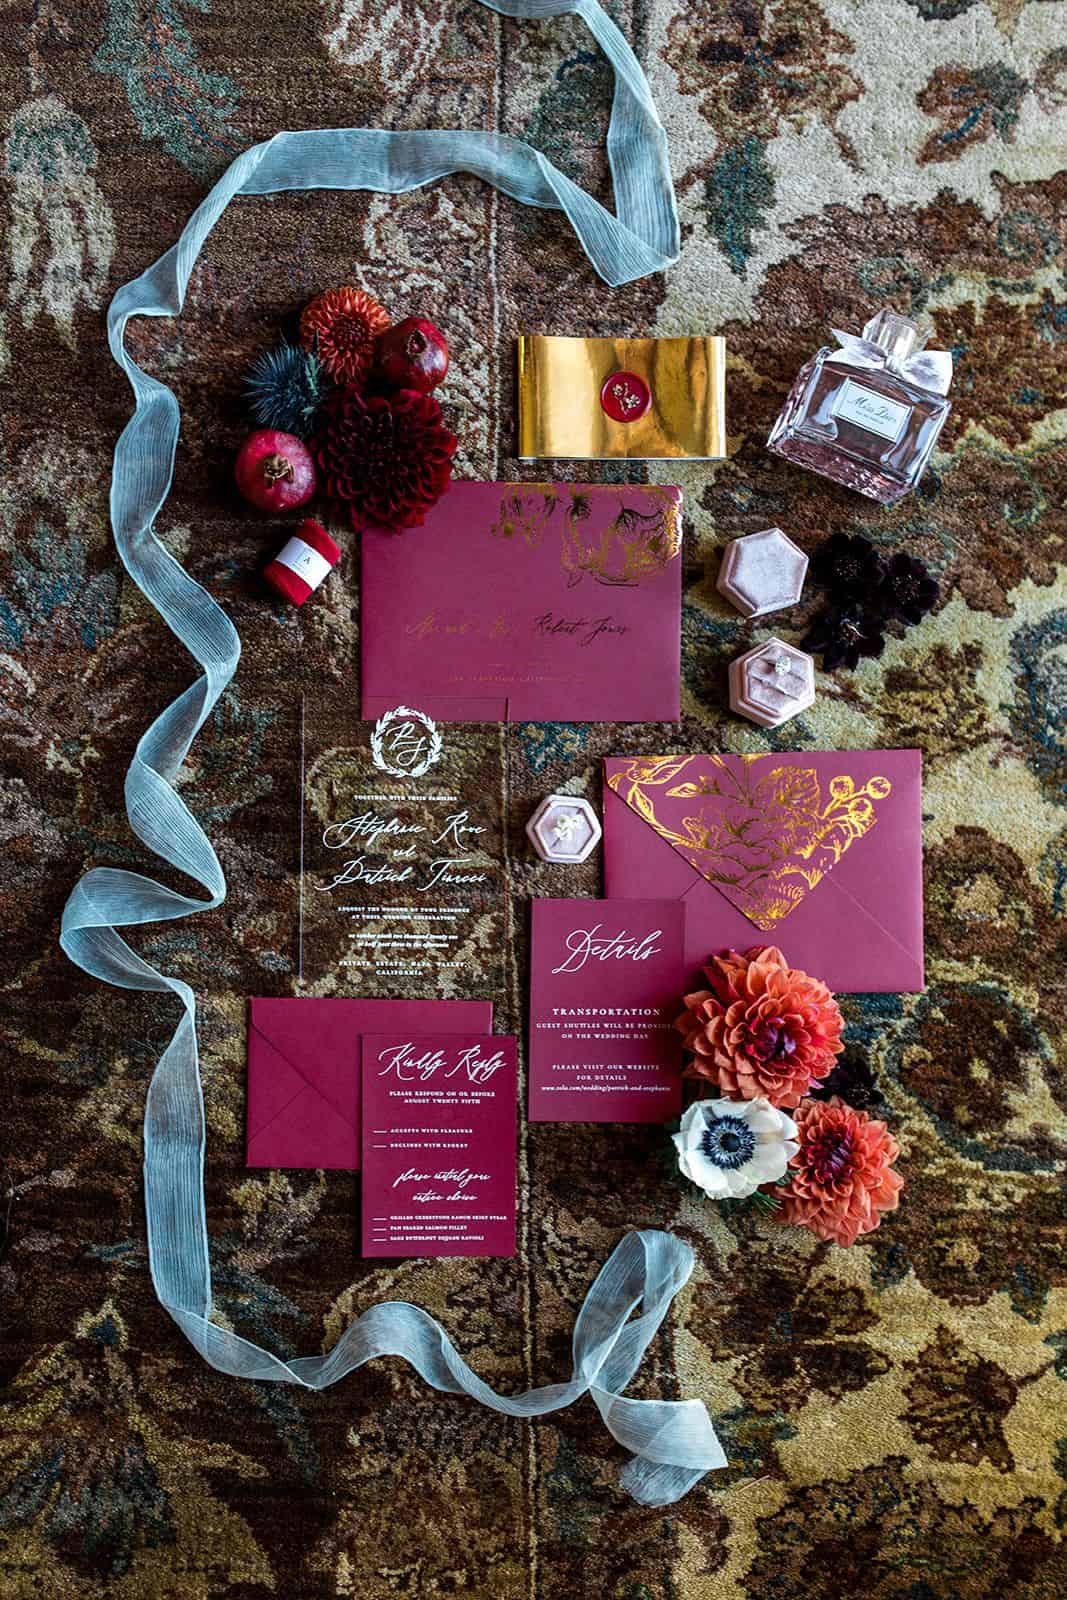
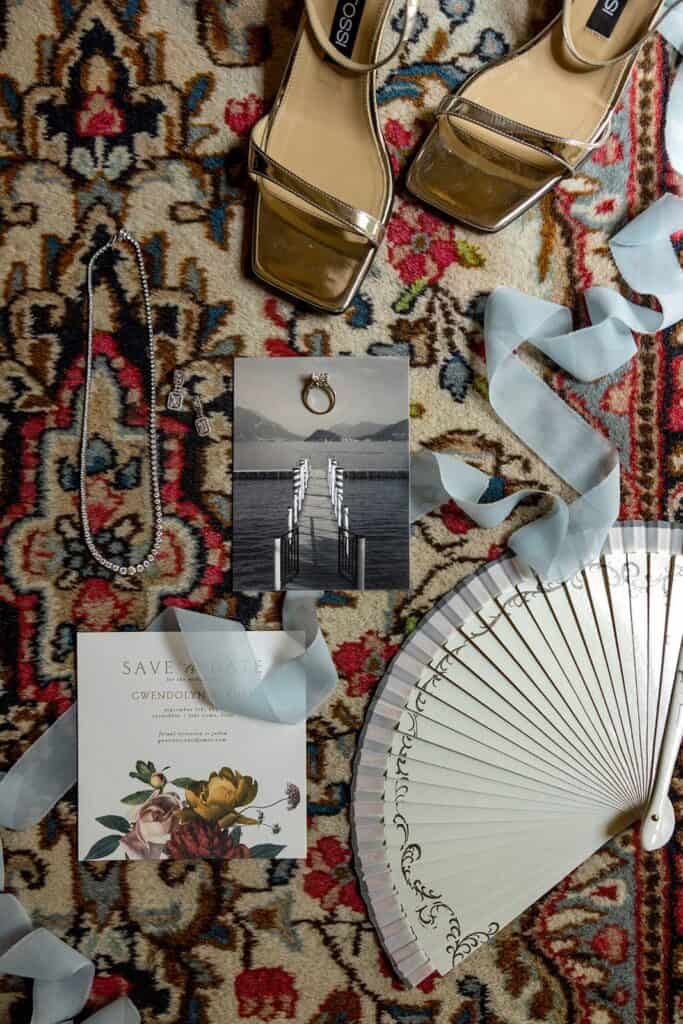
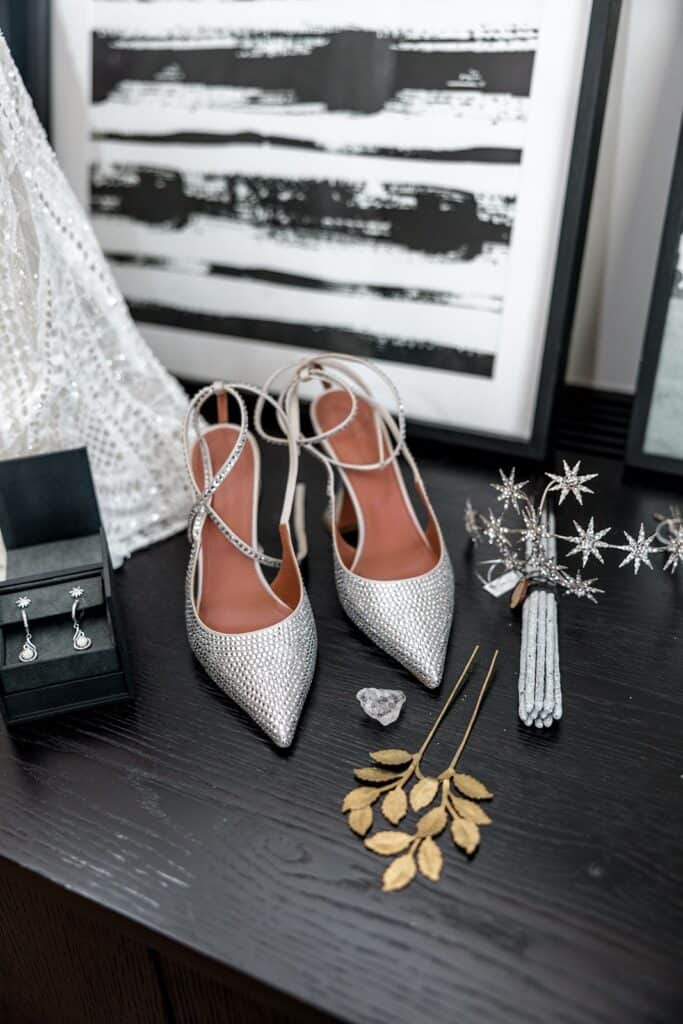
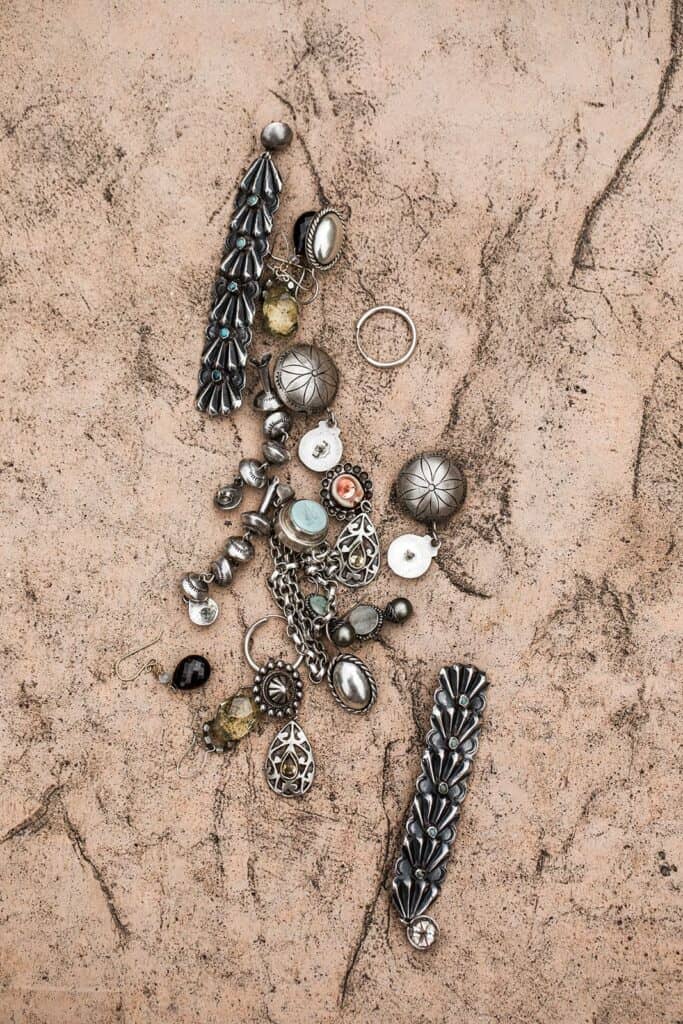
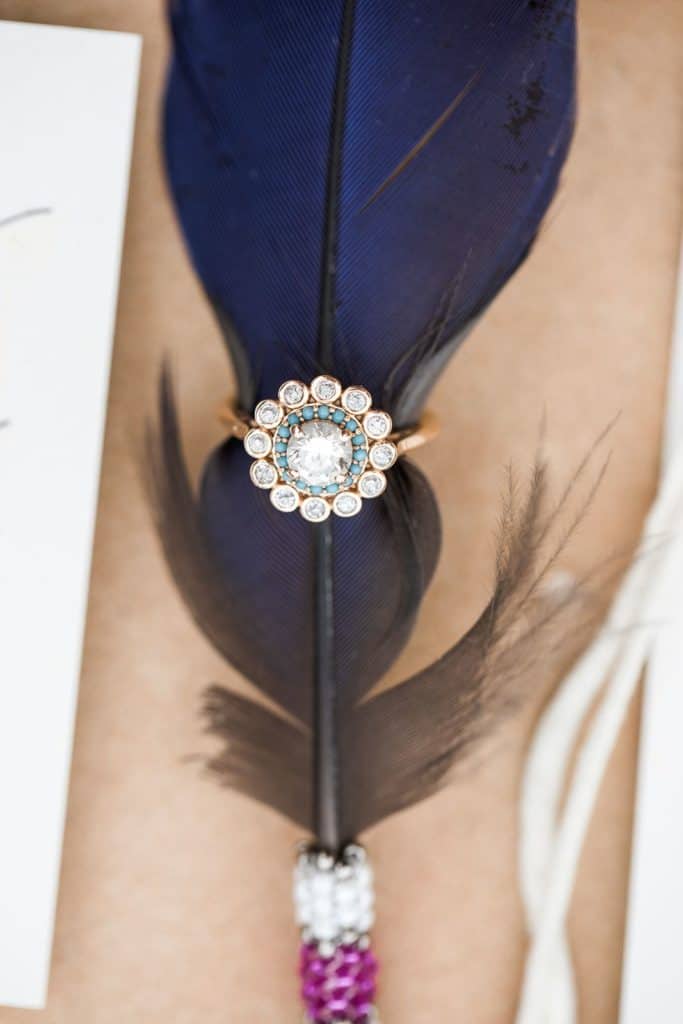
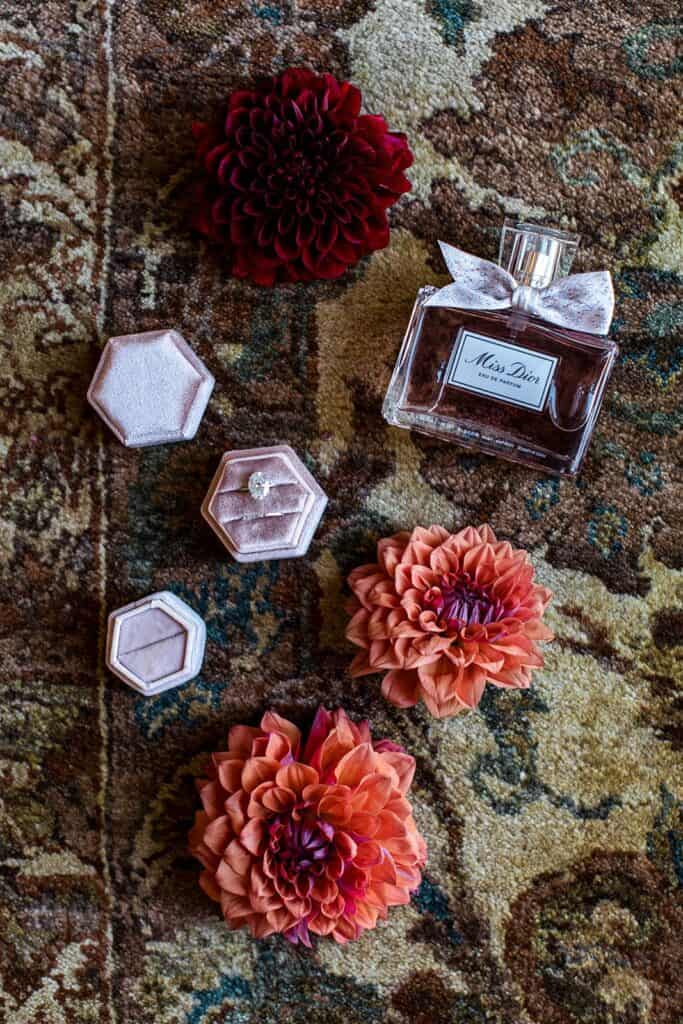
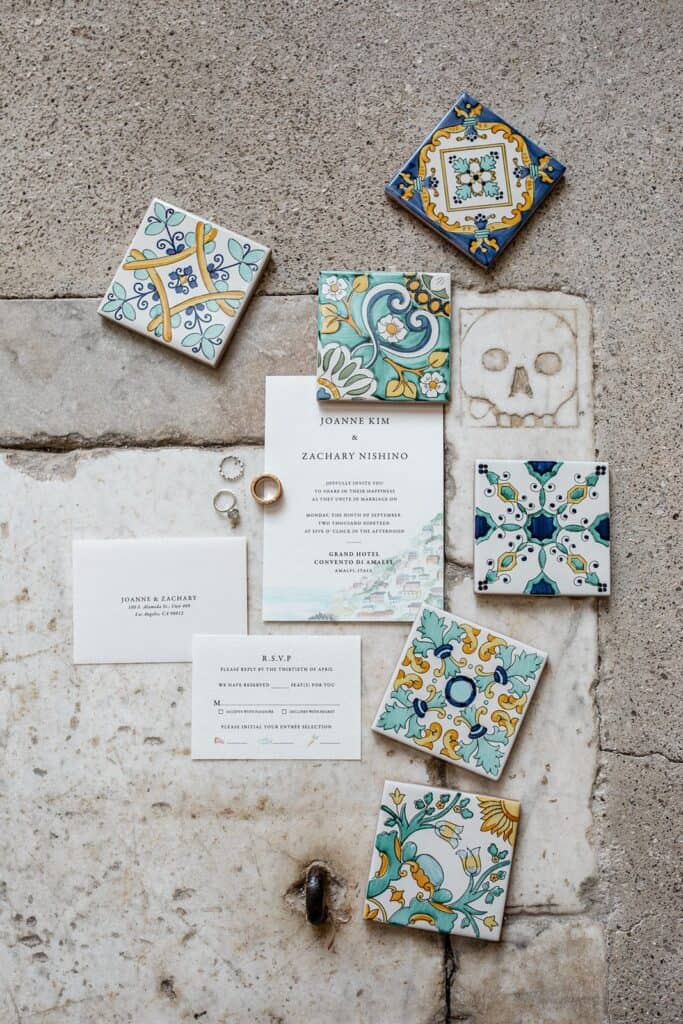
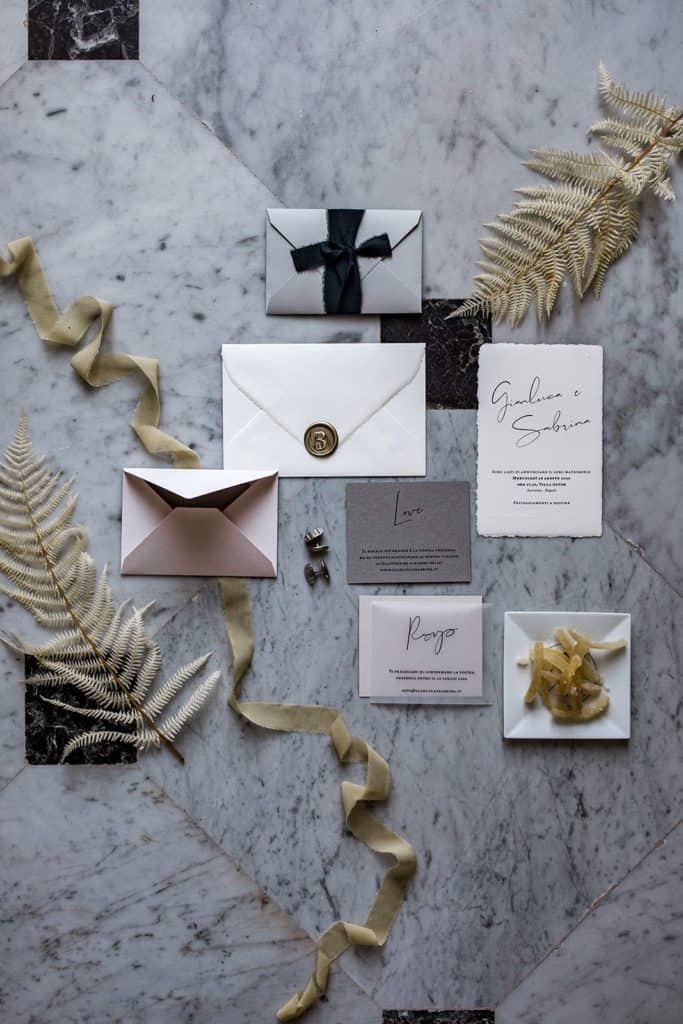
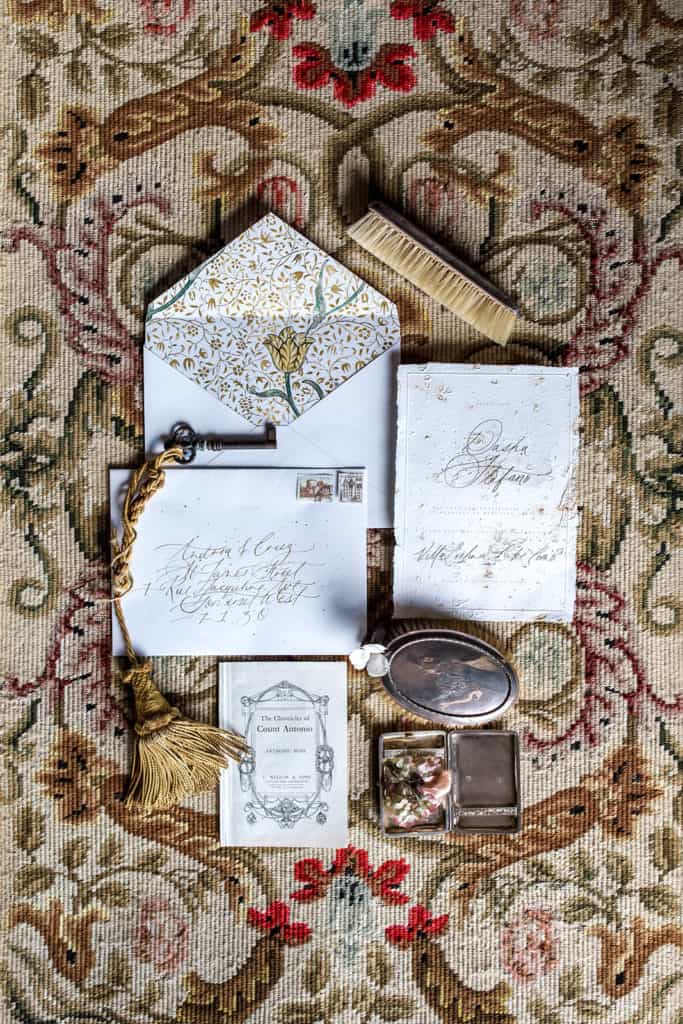
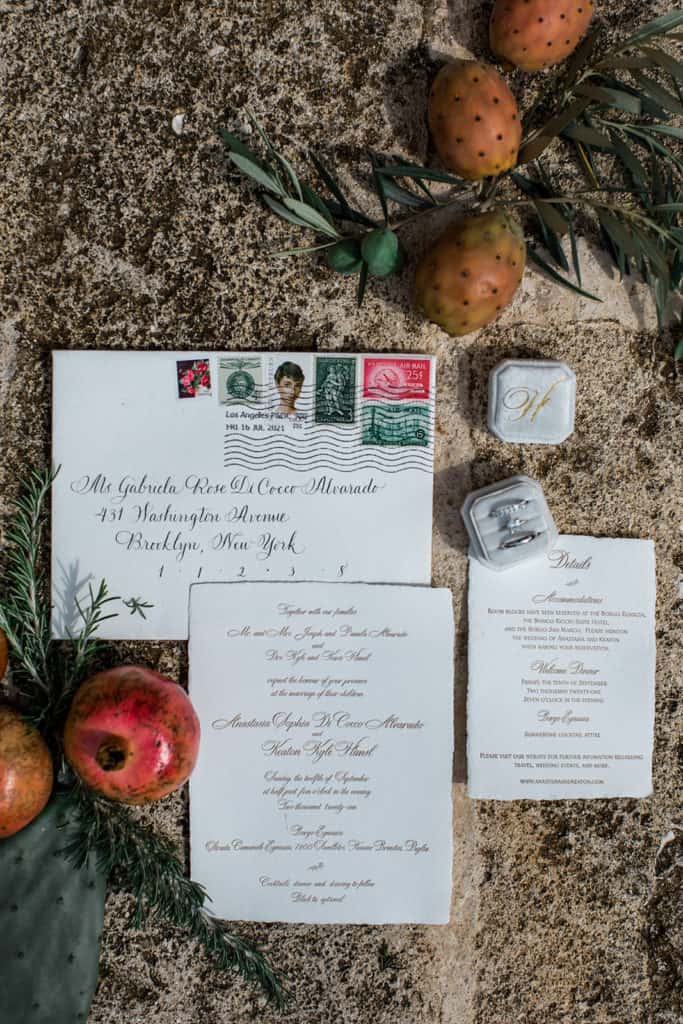
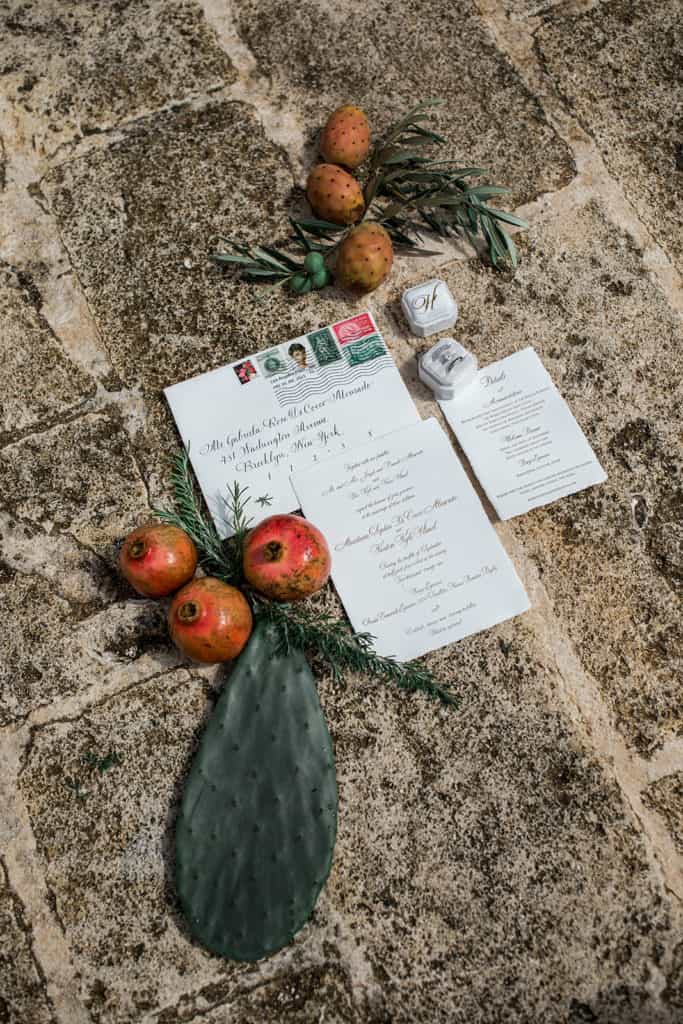
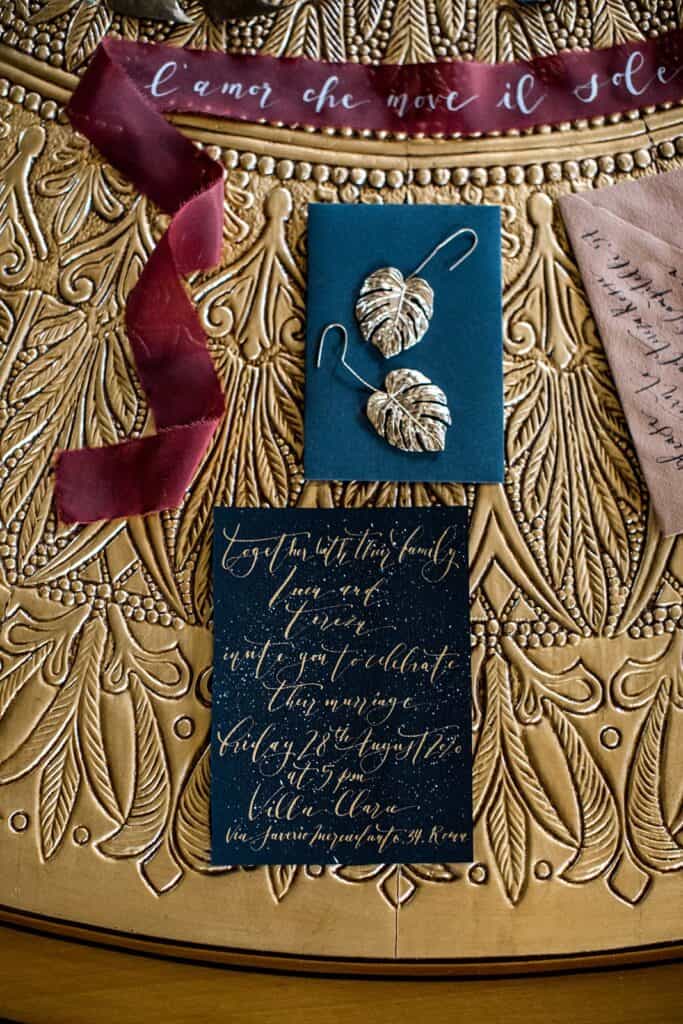
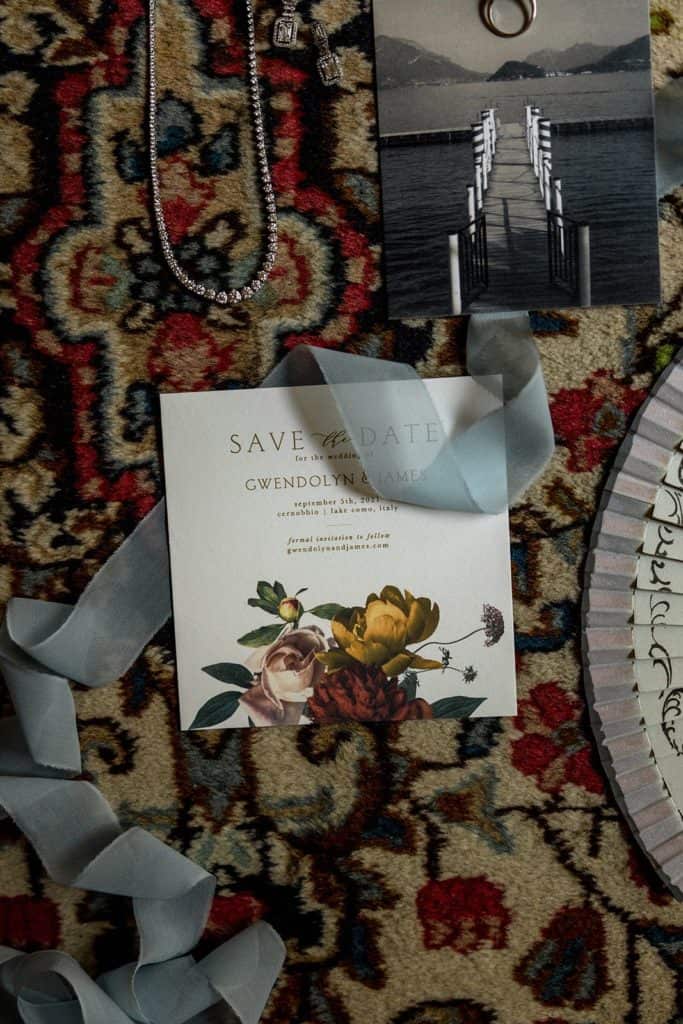
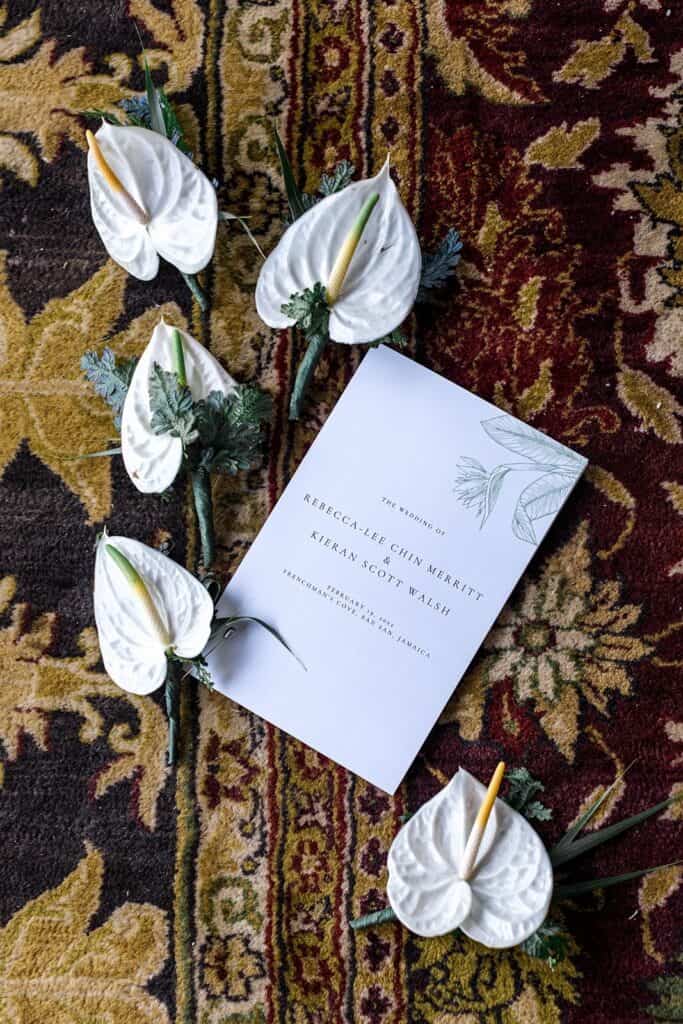
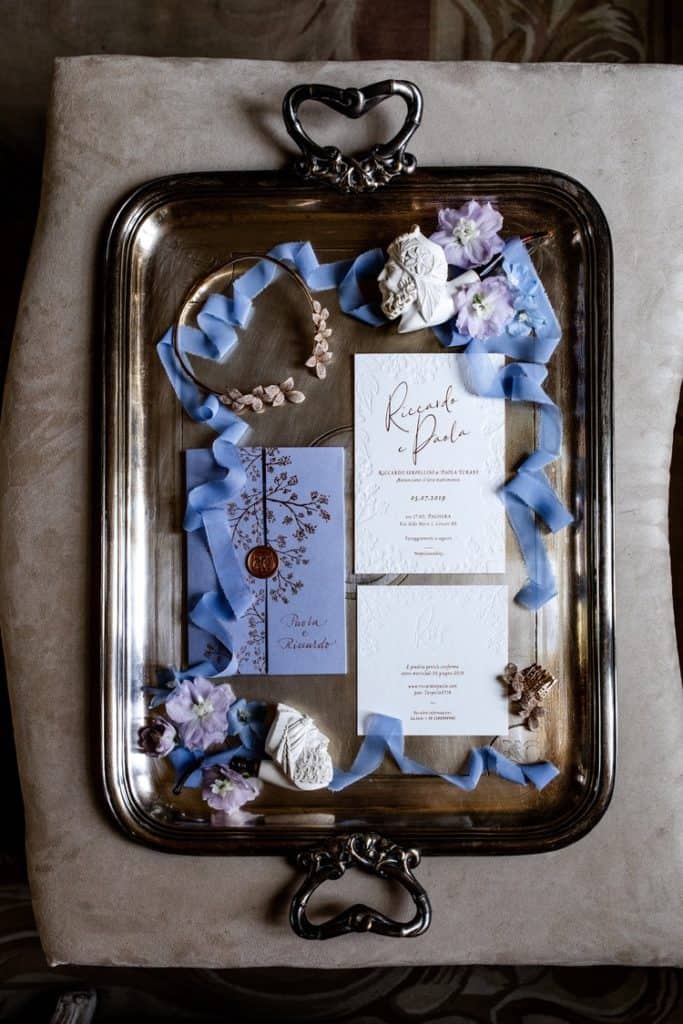
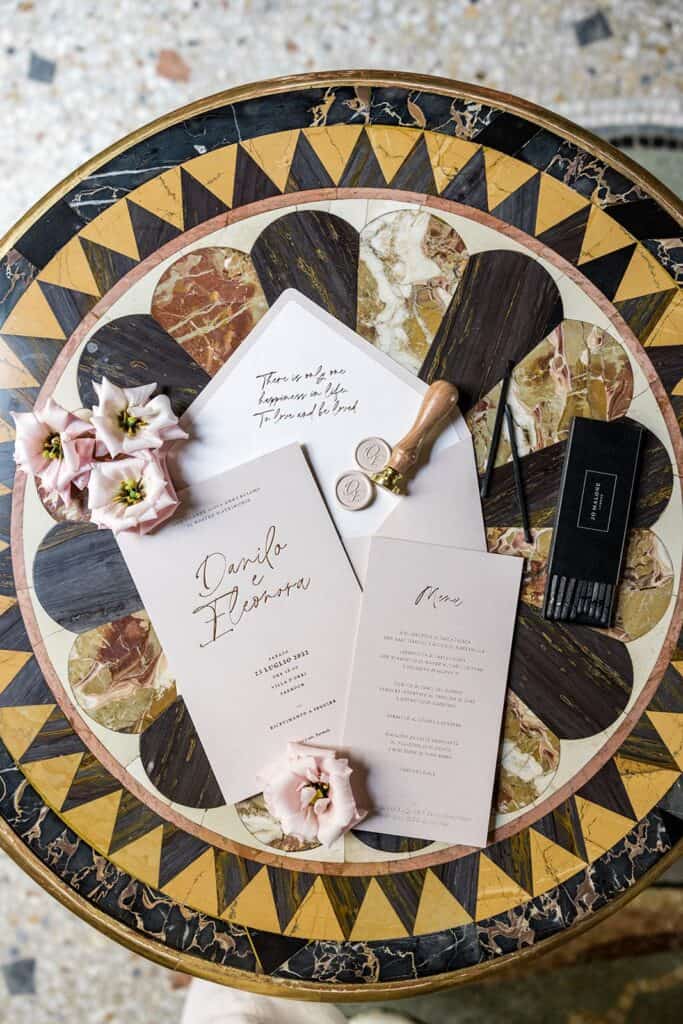
That being said! Finding a beautiful tile floor or even a patterned floor at the wedding venue can create a beautiful flat lay if it complements the overall theme or aesthetic. Take the wedding flat lay photographs below, for example.
The marble tile floor perfectly fits the black, white, and gold theme of this editorial session at Villa Astor (photo on the left). For this Villa Evelina elopement, the patterned carpet of the venue perfectly complemented the rustic, antique ambiance of the wedding (photo in the middle). And the unique pattern with blues and yellows fit matched the jewelry clutches perfectly in this Ravello destination wedding (photo right).
If you’re worried about finding a good backdrop for your flat lay photos, think about purchasing some to keep in your toolkit! There are plenty of portable options out there in all kinds of colors, patterns, and textures. Then you’ll know you have something you’re comfortable working with.
4. Work With the Location
Like I mentioned before, part of including wedding flat lay photos in your galleries is to share the story of the wedding. And what’s a story without a setting?
Your flat lay photos are the perfect time to incorporate more of the setting into the story! Plus, it’s a great way to create cohesion between the details and the overall wedding.
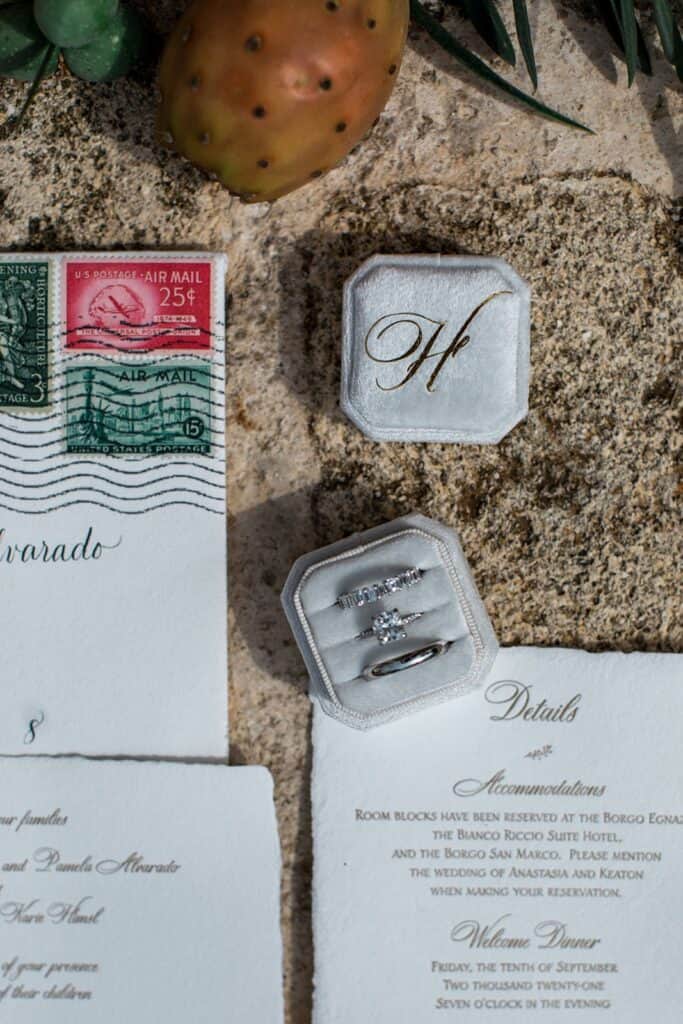
That might include adding elements that are natural to the location, such as this Borgo Egnazia wedding flat lay photography, which includes cactus leaves local to the area.
5. Hide “Lifts” Underneath Flat Lay Items
Ironically, sometimes flat lay photos look too “flat.” All of the elements seem to sink right into the backdrop, and it leaves you scratching your head while thinking, “Something’s off about these…”
Here’s the quick fix! Hide lifts underneath the items. You can purchase acrylic risers or discs to do this. Or you can get creative and just use cut pieces of dry sponge, lens caps, or small rolls of tape if you have any in your toolkit.
Then, place elements on top of the lifts. It gives it just enough “oomph,” to leave you saying, “Ahhh, that’s better!”
I particularly love adding lifts underneath invitation cards, menus, and programs because the flat pieces of paper are notorious for blending into the background. But you can also add lifts underneath flowers and even ring boxes!
6. Don’t Forget Your Props
Speaking of flowers and ring boxes, don’t forget to add props to your flat lay designs. These props will help you, again, break up the “flatness” of these kinds of photos.
And overall, it makes for a more interesting and exciting image!
Add Lead Lines
With textiles, I can arrange them in a way that makes the viewer’s eye go exactly where I want it to go. And it does it subtly so the viewer never really says, “Oh, she wants me to look here!”
I love adding spools of ribbon or swaths of fabric to my wedding flat lay photography because it’s the perfect way to incorporate lead lines.

Break Up the “Flatness”
Another way to break up the flatness is by adding dimension with different elements. This is where your miscellaneous items and flowers can come in handy!
Try laying silver or antique trays behind the invitation suite. Add flower stems around single invitation cards. Use antiques, like pocket mirrors, old-fashioned keys, hair brushes, and even cigarette cases to frame the focal point.
But one of my favorite ways to break up the flatness is to use the venue and the location as inspiration. Tie in elements of the venue into the photos to capture the setting of the wedding. I often scout the venue for unique props and then re-purpose them in my flat lay photography.
If you do this, just be sure to put the props back exactly where you found them when you’re done!
Create Texture
One other thing you can do to incorporate props and add pops is to create texture! Spools of ribbon and swaths of fabric can do this, along with creating lead lines for your flat lay photos.
Or, if you’re looking for other ways to include bridal details, try using the bride’s veil. Use it as a textured background underneath the invitation suite.
Just be sure to not put the veil directly on the floor. You don’t want to get anything dirty before the ceremony!
You can also use an embossed invitation or even flower petals to add the texture you’re looking for.
7. Keep Everything from Moving
The last thing you want to happen is to get everything perfectly in place, and then a sudden gust of wind shifts everything.
So keep yourself from feeling frazzled and frustrated by adding putty to your toolkit. I highly recommend getting “museum putty” because it keeps from damaging anything, like the invitation suite or menu cards.
Then just add this to the back of anything you don’t want to move, gently stick it to the riser or the background of your choice, and there you go!
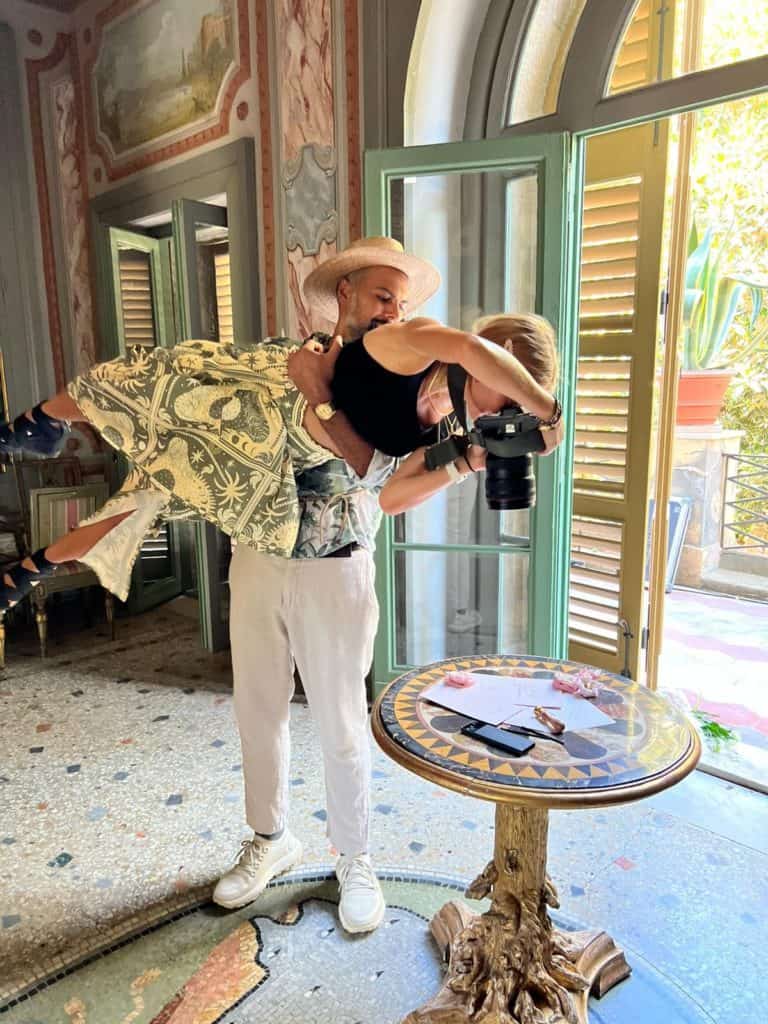
8. Lean on a Tripod (Or Get a Lift)
Because most of these photos are captured with your camera parallel to the ground, you may want to get some extra height to help you angle your camera properly.
Stand on a chair or a ladder to make sure you’re totally parallel. You can also use a tripod to help you position the camera correctly.
Or, if you have a second shooter who goes above and beyond (like I do!), maybe they can lift you up for that added height!
9. Play With Your Angles
Most of the time, everything is going to be flat and shot from up above with that “top-down” view. It usually means having your camera parallel to the ground.
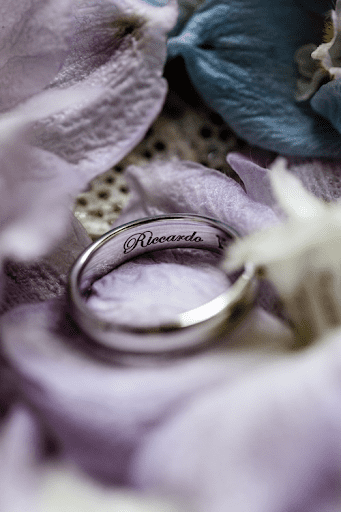
But you don’t have to stick with one single composition. Instead, play around with your angles! Add variety to your photos (and therefore, your gallery!) by photographing vertically, from an angle, and getting close-up.
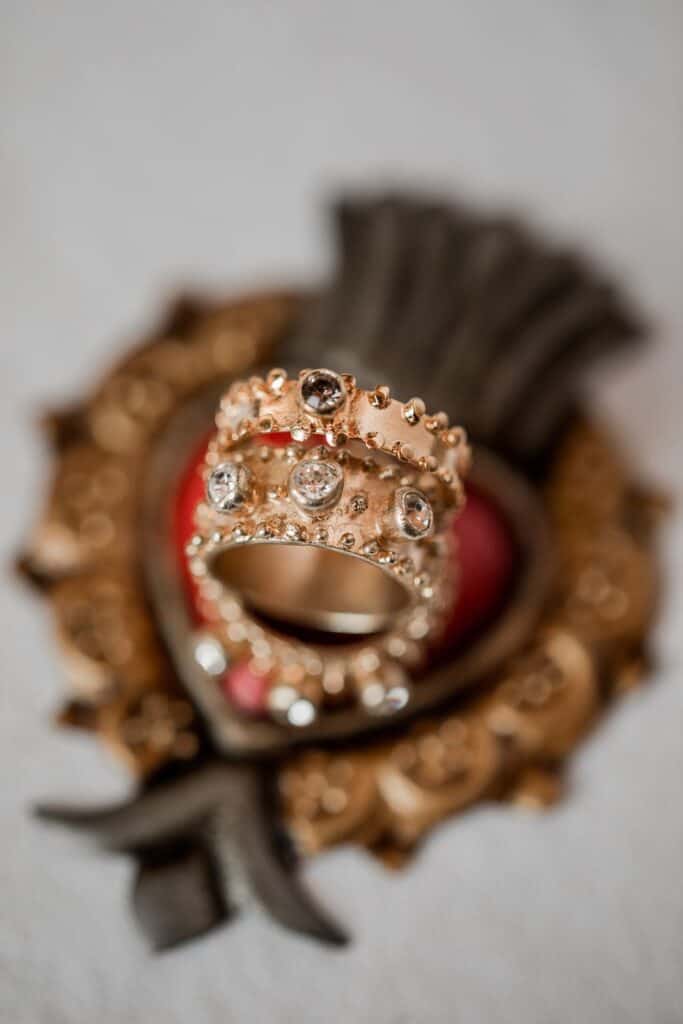
This is especially helpful for important details like rings. Get up close and shoot from the front (instead of from the top down) with rings to showcase the stones.
10. Get Plenty of Practice Beforehand!
Any part of being a destination wedding photographer requires plenty of practice, from posing your couples to designing tablescapes. That’s true for almost everything in life! And taking better flat lay wedding photographs is no different.
Before you travel to your next wedding, try setting up flat lay designs at home! You can even order mock-up invitations from many invitation printers. And if you’re still working on building your portfolio, you can add these photos to it (no clients needed)!
11. Give Yourself Plenty of Time
And my final tip to help your flat lay wedding photography is to allow yourself plenty of time on the wedding day. This is especially the case if you’re still practicing and nailing the art of this kind of photo!
As you get more comfortable with it, you may not need as much time to complete this task. But, until then, build plenty of time into your photographer’s timeline so you can set up, design the flat lay, and take plenty of photos from many different angles.
You can have your second shooter focus on other elements of getting ready, such as the bride’s dress or candid moments of the wedding party finishing their hair and makeup. That will save you the stress of having to find time for those parts, too!
The art of designing and capturing flat lay wedding photos is a skill that requires plenty of practice and experience! But when you do add these to your client galleries, you’ll add another element that sets your destination wedding photography apart from others.
Focus on building out a small flat lay toolkit with items like portable backgrounds, ribbons and other textiles, and miscellaneous items, such as antique trays and even postage stamps.
Then get plenty of practice beforehand, and give yourself enough time to create the photos you’re envisioning on the day of!
Looking for more help with your photography?


